Pico Prototyping - Building a "Pico Uno"

DroneBot Workshop
@dronebotworkshopAbout
Welcome to the Workshop! The DroneBot Workshop is the place where I work with Arduino, Raspberry Pi, ESP32, and lots of other cool microcontrollers, components, and sensors. This is a channel for learning and understanding. While I do build projects, most episodes focus on showing you HOW things work, so you can use the information to bring your own designs to life. Every video has a corresponding article on my website at https://dronebotworkshop.com , along with the diagrams and code samples you’ll need to build your own creations. You can also participate in discussions on my Forum at https://forum.dronebotworkshop.com. Please note that I no longer do any sponsored videos, enquiries for these will be ignored! If you'd like to know more about me or the DroneBot Workshop you can read the FAQ at https://dronebotworkshop.com/about-dronebot-workshop/faq/ And if you have technical questions please ask them on the Forum. Welcome to the Workshop! I hope you enjoy your stay! Bill
Latest Posts

Video Description
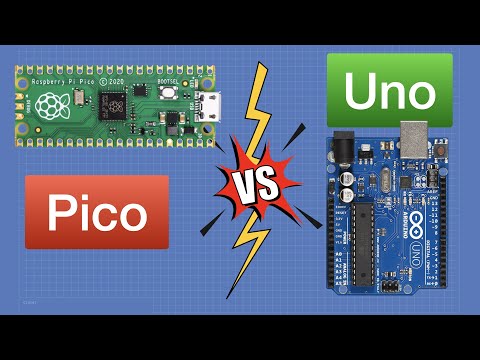
Use a Raspberry Pi Pico instead of an Arduino Uno! Build a “Pico Uno” for Pico power with Uno ease of use. Article with hookup diagrams: https://dronebotworkshop.com/pico-uno More articles and tutorials: https://dronebotworkshop.com Join the conversation on the forum: https://forum.dronebotworkshop.com Subscribe to the newsletter and stay in touch: https://dronebotworkshop.com/subscribe/ The Raspberry Pi Pico is a low-cost microcontroller that can run circles around an Arduino Uno. Yet when it comes time to test out a new sensor or library, I inevitably grab a Uno board! The main reason I rely upon a 12-year-old piece of technology over the newest wonder from Raspberry Pi is simple - the Uno is easy to use. It has female sockets to accept jumper wires, it has a reset key and a power LED, and it can be powered using USB or an external supply. But it’s really easy to add all of those features to the Pico, so today we are going to do exactly that. In fact, I’ll show you three ways of building a “Pico Uno”: 1 - Super Simple - Female DuPont connectors, put together in less than 5 minutes. 2 - Pico Uno with Reset - A board with Reset and Power LED. 3 - Pico Uno with External Power - All of the above, plus a 2.1mm jack for external power. To build the last one, we will also have to learn exactly how we use a Pico with external power. Here is the Table of Contents for today's video: 00:00 - Introduction 01:55 - Pico vs Uno 08:44 - Prototyping Boards 11:45 - Simple Proto Boards 13:59 - Pico Uno with Reset 19:49 - Powering the Pico 24:36 - Pico Uno with External Power 33:49 - Conclusion Hope you enjoy it, and I hope it shows you how easy it is to prototype with a Raspberry Pi Pico. Bill
You May Also Like


Pico Uno Kit Essentials
AI-recommended products based on this video

Microcontroller Board for Pico RP2040, Dual Core ARM Cortex M0+Processor Flexible Microcontroller Module (Transparent White)

Microcontroller Board for Pico RP2040, Dual Core ARM Cortex M0+Processor Flexible Microcontroller Module (Black)

ZFOX 50PSI Paddle Board Pump,Dual Motor SUP Pump with HD LED Display & 9 Nozzles - Auto-Shutoff & Auto Overheat Protection,12V DC Electric Air Pump for Paddle Board/Kayak/Tent/Boats/Tyres etc.
Ksipze led Lights Strip for Bedroom 100FT,Smart Music Sync RGB Color Changing with App and Remote Control, Power Supply Led Strip Lights Lumiere LED for Room Home Party Decoration

9V Battery Powered Led Kayak Strip Lights, 2 Pcs 6.56 FT RGB Color Changing Paddleboard SUP Canoes Lights, IP68 Waterproof Marine Submersible Boat Light Strip with Remote, Marine Boat Interior Light.
Microcontroller Board for Pico RP2040, Dual Core ARM Cortex M0+Processor Flexible Microcontroller Module (Transparent White)