How to Purchase Bluehost Cloud Hosting — Step by Step Guide


Create WP Site
@createwpsiteAbout
Welcome to Create WP Site – your ultimate resource for all things website creation and hosting! Whether you're a complete beginner or looking to sharpen your skills, our channel gives you everything you need to succeed online. ✅ Dive into our step-by-step WordPress tutorials for beginners and learn how to create stunning websites from scratch ✅ Discover how to build a website on Bluehost, unlock savings with exclusive Bluehost coupon codes ✅ Want to start a blog? We’ll show you how to create a blog on WordPress with Bluehost and share insider tips ✅ Watch honest, no-fluff reviews to help you choose the best hosting service for your needs We're here to help you build your dream website or blog — the smart way. 📩 For sponsorships, collaborations, or business inquiries, contact us at: [email protected] 👇 Subscribe to Create WP Site and start building the website or blog of your dreams today!
Latest Posts


Video Description
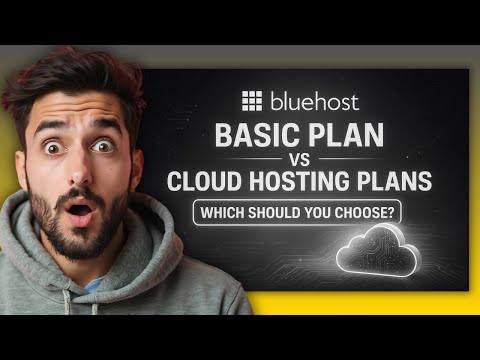
How to Purchase Bluehost Cloud Hosting | Best Cloud Hosting | Cloud Hosting Reviews ✅ Special Partner Only Deal – Save 75% on Bluehost Cloud Hosting (Over $500 Value) 👉 https://bluehost.sjv.io/je3PMP Don’t let a slow site cost you sales — lock in this exclusive Cloud Hosting discount today. If you’ve been searching for how to purchase Bluehost Cloud Hosting, this is the clear, step-by-step guide you need. Bluehost doesn’t make its cloud hosting plans super obvious on the homepage anymore, so a lot of people don’t even realize these plans still exist. In this video, I’ll walk you through exactly where to find Bluehost Cloud Hosting, how to choose the right plan, and how to complete your purchase without missing any of the important steps. Whether you’re launching a new site or upgrading from shared hosting, this guide shows you exactly how to do it right. Just a quick heads-up: when you make a purchase through our links, I earn a small commission at no extra cost to you. Before we get into the buying process, it’s important to understand what Bluehost Cloud Hosting actually is. Unlike standard shared hosting, Bluehost’s cloud plans use a virtualized environment that distributes your site’s resources across multiple servers. This improves reliability, speeds up load times, and makes your website more resilient to sudden traffic spikes. If one server has issues, your site automatically switches to another — something regular shared hosting can’t do. This makes cloud hosting a great choice if you want faster performance and better uptime without managing a complicated server setup yourself. The tricky part is that Bluehost doesn’t prominently list their cloud hosting plans on the main navigation anymore. To find them, you need to scroll down the pricing page and click the “Advanced” section. This is where Bluehost keeps their cloud hosting options tucked away. Many users miss this entirely and assume Bluehost discontinued cloud hosting, but the plans are still active — just not front and center. Once you locate the cloud hosting section, the next step is to choose the right plan. Bluehost typically offers multiple cloud tiers that vary based on CPU cores, memory, and storage. The entry-level plan is ideal for small business sites, blogs, or personal projects. Mid-tier plans give you more resources and are better for growing sites, while the top plans are great for heavier traffic and more demanding workloads. In the video, I’ll show you how to compare these options in real time so you can pick the one that fits your needs without overpaying. After selecting your plan, you’ll move to the domain setup stage. Bluehost lets you register a new domain for free with your plan, or you can use a domain you already own. If you’re migrating an existing site, choosing the “I have a domain” option will let you connect it easily. I’ll walk through both scenarios so you know exactly what to click depending on your situation. Next comes the checkout page, and this is where a lot of people accidentally overspend. Bluehost pre-selects some add-ons by default, like SiteLock or CodeGuard, which you might not need right away. I’ll show you how to review each option carefully and decide what’s actually worth keeping. This ensures you get the best deal on your Bluehost Cloud Hosting plan without paying for extras you don’t use. Once you complete your purchase, Bluehost sets up your account automatically, and you’ll receive your login credentials within minutes. From there, you can log into the Bluehost dashboard and start building your site or migrating your existing one. If you’re using WordPress, Bluehost makes it incredibly easy with one-click installation — no technical skills required. The key advantage of following this step-by-step approach is that you won’t miss any of the less obvious steps, like where the cloud hosting plans are actually hidden or how to deselect unnecessary add-ons. By the end of this video, you’ll know exactly how to purchase Bluehost Cloud Hosting quickly, correctly, and at the best price. 👍 If this step-by-step guide on how to purchase Bluehost Cloud Hosting helped you, don’t forget to like the video, share your experience in the comments, and subscribe for more clear, honest hosting tutorials. #BluehostCloudHosting #HowToPurchaseBluehostCloudHosting #Bluehost #CloudHosting #WordPressHosting #WebsiteBuilder #WebHosting2025


![WordPress Tutorial For Beginners 2025 [MADE EASY]](https://imgz.pc97.com/?width=500&fit=cover&image=https://i.ytimg.com/vi/GNh5dvy4toI/hqdefault.jpg)

![How To Create Anchor Links In WordPress FAST [2023 GUIDE]](https://imgz.pc97.com/?width=500&fit=cover&image=https://i.ytimg.com/vi/391g_2a5KLg/hqdefault.jpg)
![How To Use WordPress Block Editor 2023 [MADE EASY]](https://imgz.pc97.com/?width=500&fit=cover&image=https://i.ytimg.com/vi/6_1aGbLgUEo/hqdefault.jpg)
Secure Your Site's Future
AI-recommended products based on this video
