Hunting Knife Restoration: Impossible?!

Screws And Tools
@screwsandtoolsAbout
Hello I'm Alex! Thank you for attention and welcome to my channel. Screws and Tools is a channel dedicated to restoring old, antique, vintage, and rusty tools. I cover woodworking, metalworking (including non‑ferrous metals), leatherworking, knife making, and various DIY projects—all produced by me alone. I restore items such as knives, Caucasian daggers, swords, shashkas, sabers, cleavers, axes, and kitchen tools, continually honing my craft. And importantly, I always show my mistakes—because when you watch my videos, you learn not only from what works, but also from what doesn’t. I hope you enjoy my videos—thank you for watching! I truly appreciate every visit to my channel. Don’t forget to subscribe and join me on this restoration journey!
Latest Posts


Video Description
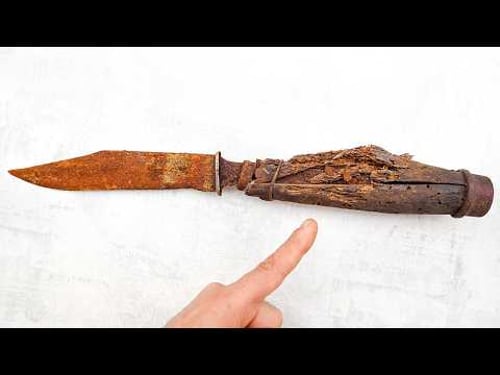
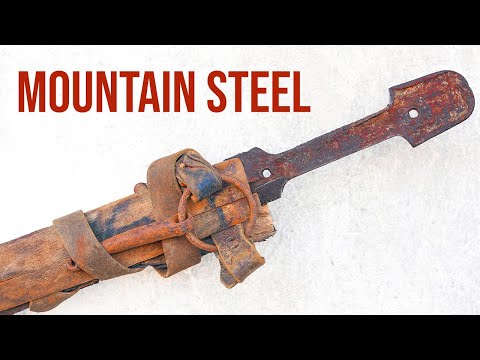
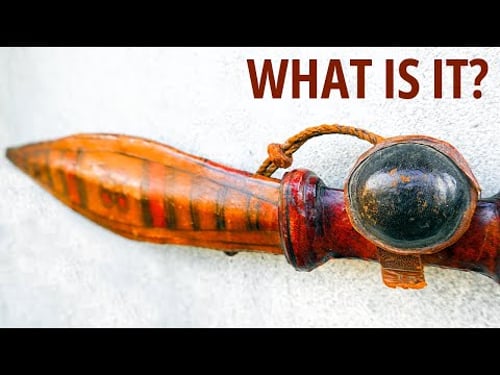
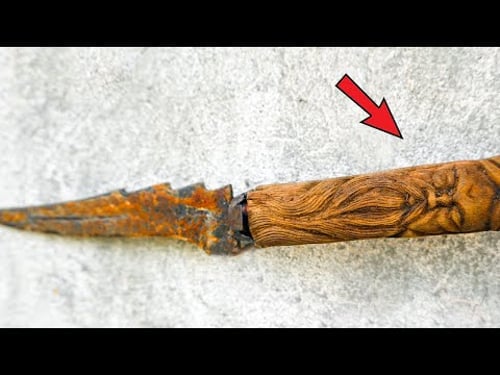
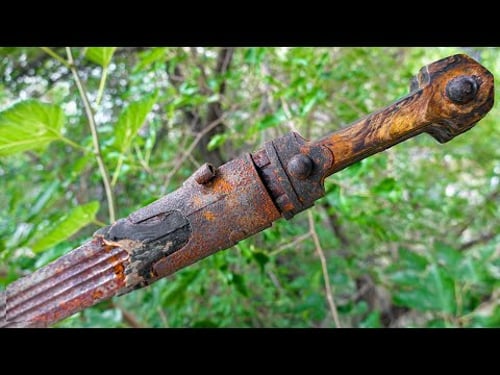
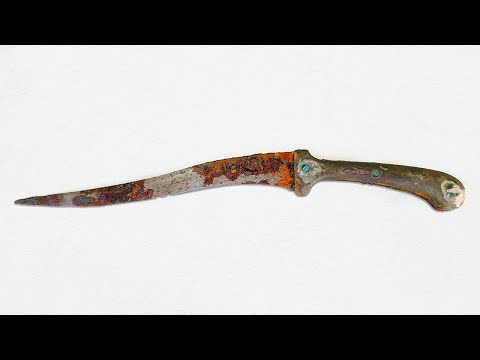
Hi! Today I’m restoring an old rusty hunting knife. I bought it at a flea market — its condition, as always, was below average. But this time at least the cutting edge wasn’t completely rotten. Of course, I bought this piece and started working on its restoration. First, I cleaned the surface using a wire brush. Then I placed the blade in a rust remover. What was left of the handle reminded me of a chisel handle — or maybe a gouge. I could be wrong. After cleaning, I placed the blade in warm water with baking soda to neutralize the acid. I sanded the blade by hand, using sandpaper from 120 to 500 grit. Once I finished sanding, I made new bevels — or rather, corrected the old ones. And to give the surface its final texture, I treated the blade again with a wire brush. The next step was the handle — and here I really had to sweat a bit. Why? Because I started with walnut wood — dry, solid walnut. Everything was great, but during shaping I removed too much material, and the handle became too thin. Of course, that’s unacceptable and could break later. So I had to start over. I used beech next, but drilled deeper than needed. Then I tried another piece of wood — and the drill bit broke off inside. On the fourth attempt, I finally got lucky: I used elk antler, leather, and a small piece of plastic. After fitting and shaping everything, I glued the handle together. Once the glue dried, I shaped it, made a lanyard hole, added a bit of decoration, and, of course, moved on to making the sheath. The sheath is very simple — made for a left-handed user. I used medium-thickness dark leather. After finishing the sheath, I shaped and treated it, and then made a small test of the knife for you. I hope you’ll enjoy this restoration video. Don’t forget to share it and leave your thoughts in the comments. And of course — hit the like button! If you’d like to purchase one of my projects, feel free to contact me — don’t be shy. Please subscribe to my channel: @ScrewsAndTools 🍖 My New Cooking channel! @screwsandtoolscooking Patreon: https://www.patreon.com/Screwsandtools Paypal: paypal.me/screwsandtools Facebook: https://www.facebook.com/scresandtools/ Instagram: https://www.instagram.com/screwsandtools/ #screwsandtools #knife #restoration


No Recommendations Found
No products were found for the selected channel.